Setting Up Supabase Auth with Resend SMTP

Supabase's built-in authentication is powerful, but its default email service has limitations — rate limits, deliverability concerns, and the dreaded spam folder.
By connecting Resend as your SMTP provider, you get reliable email delivery with a generous free tier (3,000 emails/month) and a developer-friendly experience. In this guide, lets go through configuring Supabase Auth to send verification emails, password resets, and magic links through Resend.
Prerequisites
Before we start, you'll need:
- A domain managed through Cloudflare
- A Supabase project with Auth enabled
- A Resend account (sign up at resend.com)
Setting Up Your Website with Cloudflare
Deploy your site with Cloudflare Pages and Next.js — it's free, fast, and handles SSL automatically. Check out my guide on deploying your Next.js site with Cloudflare Pages to get started.
Table of Contents
- Adding Your Domain to Resend
- Configuring Supabase SMTP
- Try It Out
- How It Works
- Adding Google Sign-In
- Adding GitHub Sign-In
Supabase Auth with Resend SMTP
Auth with email
Adding Your Domain to Resend
First, add your domain to Resend so you can send emails from your own address (e.g., noreply@yourdomain.com).
- In the Resend dashboard, go to Domains and click Add Domain
- Enter your domain name and select your region
- Resend will provide you with DNS records to add
Head to Cloudflare (or your DNS provider) and add these records:
| Type | Name | Value |
|---|---|---|
| MX | send | feedback-smtp.us-east-1.amazonses.com |
| TXT | send | v=spf1 include:amazonses.com ~all |
| TXT | resend._domainkey | (your DKIM key from Resend) |
Once added, click Verify in Resend. DNS propagation usually takes a few minutes.
Resend offers a one-click integration — just click Connect to Cloudflare and it will automatically add the DNS records for you.
Configuring Supabase SMTP
Now connect Resend to Supabase:
- In Resend, go to API Keys and create a new key
- In your Supabase dashboard, navigate to Project Settings → Auth
- Scroll to SMTP Settings and enable custom SMTP
- Enter the following:
| Setting | Value |
|---|---|
| Host | smtp.resend.com |
| Port | 465 |
| User | resend |
| Password | (your Resend API key) |
| Sender email | noreply@yourdomain.com |
| Sender name | Your App Name |
Save the settings and send a test email to verify everything works.
Try It Out
Here's a live demo — sign up with your email and you'll receive a confirmation email sent through Resend:
How It Works
Let's walk through the code that powers the demo above.
Setting Up the Supabase Client
First, create a Supabase client with your project credentials:
import { createClient } from '@supabase/supabase-js'

const supabaseUrl = process.env.NEXT_PUBLIC_SUPABASE_URL!
const supabaseAnonKey = process.env.NEXT_PUBLIC_SUPABASE_PUBLISHABLE_KEY!

export const supabase = createClient(supabaseUrl, supabaseAnonKey)
You can find these values in your https://supabase.com/dashboard/project/PROJECT_ID/settings/api-keys Replace PROJECT_ID with your actual project ID.
Handling Sign Up
When a user signs up, we call supabase.auth.signUp() with their email and password. The emailRedirectTo option tells Supabase where to send the user after they click the verification link:
const { error } = await supabase.auth.signUp({
  email,
  password,
  options: {
    emailRedirectTo: window.location.href,
  },
})
This triggers Supabase to send a verification email through your configured SMTP provider (Resend).
Listening for Auth State Changes
The key to handling the verification flow is listening for auth state changes. When the user clicks the verification link and returns to your site, Supabase automatically detects the token in the URL and creates a session:
useEffect(() => {
  // Check for existing session on page load
  supabase.auth.getSession().then(({ data: { session } }) => {
    setUser(session?.user ?? null)
  })

  // Listen for auth changes (handles verification redirect)
  const { data: { subscription } } = supabase.auth.onAuthStateChange(
    (_event, session) => {
      setUser(session?.user ?? null)
    }
  )

  return () => subscription.unsubscribe()
}, [])
Configuring Redirect URLs
In your Supabase dashboard under Authentication → URL Configuration, make sure to:
- Set the Site URL to your production domain
- Add your specific page URLs to Redirect URLs (avoid wildcards in production for security)
This ensures the verification link redirects users back to the correct page.
Adding Google Sign-In
Social login for reduced friction
While email/password authentication is solid, social sign-in provides a frictionless experience for users. Let's add Google Sign-In to your Supabase project.
For detailed guidance, see the official Google Sign-In documentation and Supabase Google Auth documentation.
Step 1: Set Up Google Auth Platform
-
Go to Google Cloud Console
-
Create a new project (or select an existing one)
-
Navigate to Google Auth Platform
If this is your first time, you'll see:
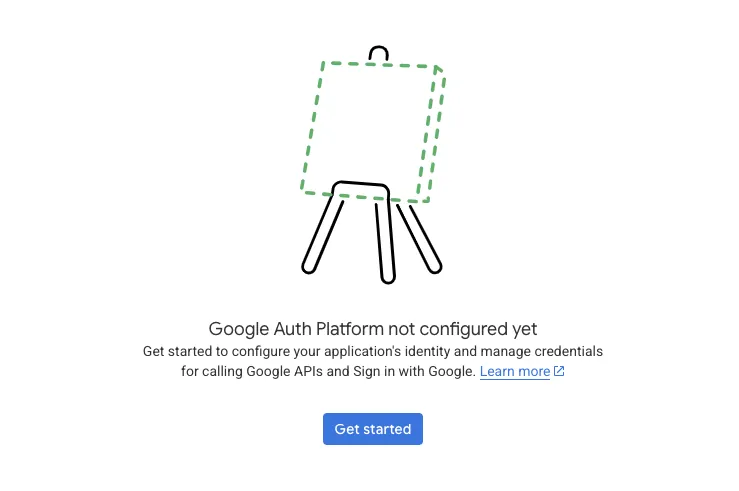
Click Get Started to begin configuration.
Step 2: Configure Branding
Fill in your application details:
- App name: Your application name
- User support email: Contact email for users with questions
Step 3: Configure Audience
Choose your user type:
- External: For public applications (available to any Google account)
- Internal: For apps restricted to your Google Workspace organization
For most applications, select External.
Step 4: Create OAuth Client ID
Once branding and audience are configured, create your client credentials:
-
Navigate to Clients in the Google Auth Platform
-
Click Create Client
-
Select Web application as the application type
-
Enter a name for your client (e.g., your domain name)
-
Add Authorized JavaScript origins:
http://localhost:3000(for development)https://yourdomain.com(your production domain)
-
Add Authorized redirect URIs:
https://[your-project-ref].supabase.co/auth/v1/callback
-
Click Create
-
Copy your Client ID and Client Secret (you'll need both)
Step 5: Configure Google Provider in Supabase
- In your Supabase dashboard, go to Authentication → Providers
- Find Google and toggle it On
- Paste your Google Client ID into the Client ID field
- Paste your Google Client Secret into the Client Secret field
- Click Save
Step 6: Implement Google Sign-In Button
Add a Google sign-in button to your authentication component:
import { useState } from 'react'
import { supabase } from '@/lib/supabase'

export function AuthForm() {
  const [isLoading, setIsLoading] = useState(false)

  const handleGoogleSignIn = async () => {
    setIsLoading(true)
    try {
      const { error } = await supabase.auth.signInWithOAuth({
        provider: 'google',
        options: {
          redirectTo: window.location.href,
        },
      })
      if (error) throw error
    } catch (error) {
      console.error('Sign in error:', error)
    } finally {
      setIsLoading(false)
    }
  }

  return (
    <div className="auth-container">
      <button
        onClick={handleGoogleSignIn}
        disabled={isLoading}
        className="btn-google"
      >
        {isLoading ? 'Signing in...' : 'Sign in with Google'}
      </button>
    </div>
  )
}
Step 7: Handle OAuth Redirect
When users sign in with Google, they're redirected back to your site. The same onAuthStateChange listener we set up earlier handles this automatically:
useEffect(() => {
  // Check for existing session on page load
  supabase.auth.getSession().then(({ data: { session } }) => {
    setUser(session?.user ?? null)
  })

  // Listen for auth changes (handles OAuth redirect)
  const { data: { subscription } } = supabase.auth.onAuthStateChange(
    (_event, session) => {
      setUser(session?.user ?? null)
    }
  )

  return () => subscription.unsubscribe()
}, [])
When the OAuth flow completes, Supabase automatically creates a session and your listener will detect it.
Try Google Sign-In
Here's the updated demo with Google Sign-In enabled:
Accessing Google User Data
When a user signs in with Google, their profile information is available in the session:
const { data: { user } } = await supabase.auth.getUser()

console.log(user?.email)
console.log(user?.user_metadata?.full_name)
console.log(user?.user_metadata?.picture) // Google profile picture
Combining Email and Social Sign-In
Users can link their Google account to their email account:
const { error } = await supabase.auth.linkIdentities({
  provider: 'google',
})
This allows existing email users to sign in with Google on their next visit.
Adding GitHub Sign-In
Social login for developers
GitHub authentication is a great addition for developer-focused applications. Let's add GitHub Sign-In to your Supabase project.
For detailed guidance, see the Supabase GitHub Auth documentation.
Step 1: Get Your Callback URL
Before registering with GitHub, retrieve your callback URL from Supabase:
- Navigate to your Supabase Project Dashboard
- Click the Authentication icon in the left sidebar
- Select Sign In / Providers under Configuration
- Expand the GitHub section to find your callback URL (format:
https://<project-ref>.supabase.co/auth/v1/callback)
Step 2: Register GitHub OAuth App
Create a new GitHub OAuth application:
- Go to GitHub Developer Settings
- Click New OAuth App (or Register a new application)
- Fill in these fields:
- Application name: Your app's name
- Homepage URL: Your app's full website URL
- Authorization callback URL: Paste your Supabase callback URL from Step 1
- Leave "Enable Device Flow" unchecked
- Click Register Application
Step 3: Copy Credentials
From your newly created GitHub app:
- Copy your Client ID
- Click Generate a new client secret and copy it
Step 4: Configure GitHub Provider in Supabase
- In your Supabase dashboard, go to Authentication → Providers
- Find GitHub and toggle it On
- Paste your GitHub Client ID into the Client ID field
- Paste your GitHub Client Secret into the Client Secret field
- Click Save
Step 5: Implement GitHub Sign-In Button
Add a GitHub sign-in button to your authentication component:
import { useState } from 'react'
import { supabase } from '@/lib/supabase'

export function AuthForm() {
  const [isLoading, setIsLoading] = useState(false)

  const handleGithubSignIn = async () => {
    setIsLoading(true)
    try {
      const { error } = await supabase.auth.signInWithOAuth({
        provider: 'github',
        options: {
          redirectTo: window.location.href,
        },
      })
      if (error) throw error
    } catch (error) {
      console.error('Sign in error:', error)
    } finally {
      setIsLoading(false)
    }
  }

  return (
    <div className="auth-container">
      <button
        onClick={handleGithubSignIn}
        disabled={isLoading}
        className="btn-github"
      >
        {isLoading ? 'Signing in...' : 'Sign in with GitHub'}
      </button>
    </div>
  )
}
Step 6: Handle OAuth Redirect
When users sign in with GitHub, they're redirected back to your site. The same onAuthStateChange listener we set up earlier handles this automatically:
useEffect(() => {
  // Check for existing session on page load
  supabase.auth.getSession().then(({ data: { session } }) => {
    setUser(session?.user ?? null)
  })

  // Listen for auth changes (handles OAuth redirect)
  const { data: { subscription } } = supabase.auth.onAuthStateChange(
    (_event, session) => {
      setUser(session?.user ?? null)
    }
  )

  return () => subscription.unsubscribe()
}, [])
When the OAuth flow completes, Supabase automatically creates a session and your listener will detect it.
Try GitHub Sign-In
Here's the updated demo with GitHub Sign-In enabled:
Accessing GitHub User Data
When a user signs in with GitHub, their profile information is available in the session:
const { data: { user } } = await supabase.auth.getUser()

console.log(user?.email)
console.log(user?.user_metadata?.name)
console.log(user?.user_metadata?.avatar_url) // GitHub profile picture
console.log(user?.user_metadata?.user_name)  // GitHub username
Combining Multiple Social Providers
You can offer multiple authentication methods to users:
const { error } = await supabase.auth.linkIdentities({
  provider: 'github',
})
This allows existing email or Google users to link their GitHub account for a seamless multi-provider authentication experience.